If you want to install IPA with Esign without a computer, you’re in the right place: Esign does the whole job on the phone itself, downloading the IPA, signing it with a certificate, and installing it from one app. No Mac, no Windows PC, no cable. This guide covers what Esign is in 2025-2026, what you need first, the exact signing steps, and how to handle the two headaches that come with on-device signing, the “Untrusted Developer” message and the app that quietly stops opening after a week.
For the wider picture of sideloading options, see our pillar guide on how to install IPA files on iPhone without a jailbreak.
What Esign is, and who it’s for
Esign is an on-device IPA signer and installer. Instead of plugging your phone into a computer like you would with Sideloadly, you import an IPA into Esign, pick a signing certificate, and the app re-signs the binary so iOS will run it. No desktop software involved.
It suits casual users who just want an app on the Home Screen quickly. If you install one or two apps and don’t mind re-signing now and then, Esign is a reasonable pick. People who want a more hands-off, self-refreshing setup tend to prefer SideStore, which renews signatures over Wi-Fi. Esign does more by hand, but it never touches a computer.
One thing to know up front: the original Esign distribution went through turmoil in 2025, and you’ll now find many community-rebuilt versions and forks (eSign+, Feather, and others) floating around. That matters for safety, which I’ll come back to.
What you need before you install IPA with Esign
- An iPhone or iPad on a supported iOS version. Current Esign builds cover roughly iOS 16 through 18.7 and the iOS 26 line, but exact compatibility is build-dependent, so check the specific build you’re downloading.
- The .ipa file you want to install, saved to your device or reachable by a download link.
- A signing certificate. You have two realistic options:
- A free certificate tied to a free Apple Developer account or a shared “free/global” certificate. Free apps work for 7 days before they need re-signing, and a free Apple ID caps you at 3 signed apps at a time.
- A paid developer certificate or a purchased private certificate (often a .p12 file plus a provisioning profile). These last much longer, weeks to months, sometimes up to a year, and they don’t trip the 3-app limit.
Worth weighing before you sink time into it: shared free certificates get revoked by Apple constantly, sometimes more than once a week. A private certificate is the calmer route if you plan to keep an app around.
Installing Esign itself
Because Esign isn’t on the App Store, you install it like any other sideloaded app.
- Open Safari and go to a current Esign download page or its GitHub release. Look for the signed installer link.
- Tap the install link. Some distribution sites also offer a DNS profile or configuration profile to help block revocations. This is optional and specific to those sites, not a normal step. If one is offered and you want it, download it, then go to Settings > General > VPN & Device Management and install the profile.
- Tap Install for Esign and wait for the icon to land on your Home Screen.
- Open Settings > General > VPN & Device Management. Where Esign appears depends on how that build was signed: an enterprise-signed build shows under an Enterprise App heading, while a free/personal-signed build shows under a personal developer identity. Tap the certificate associated with Esign, tap Trust, and confirm. On iOS 18, iPadOS 18, and the iOS 26 line, you’ll tap Allow & Restart instead, and the device reboots to finish establishing trust.
- Launch Esign. If it opens without crashing, the certificate is valid for now.
If Esign refuses to open or shows “Unable to Verify App,” its own enterprise certificate has likely been revoked. Grab a fresh build from a trusted source and reinstall.
Signing and installing your IPA
With Esign open:
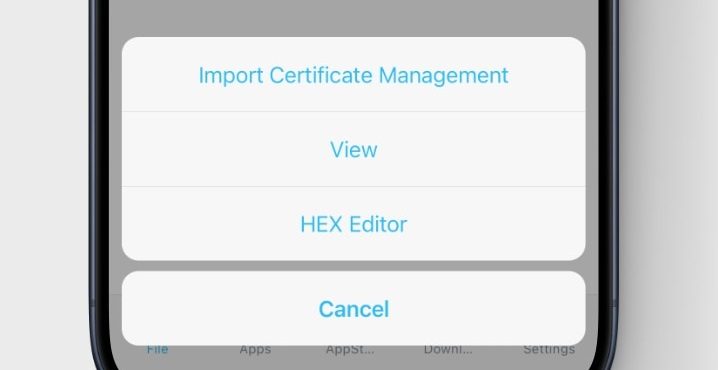
Esign’s menu, where you import a certificate before signing an app.
- Go to the Files tab and import your .ipa. Tap the import option (often the three-dot or + menu) and pick the file from Files, or paste a download URL.
- Move the IPA into the app library. In most builds you tap the file and choose Import to library, then switch to the Apps tab.
- If you’re using a .p12 certificate, import it first: open the certificate menu, add your .p12 file and its password, plus the provisioning profile if one came with it. Skip this if you’re signing with a built-in or free certificate.
- In the Apps tab, select your imported app and open the Signature menu. Choose your certificate and confirm the signing options.
- Tap Sign. Esign rebuilds the app with your certificate.
- Once signing finishes, tap Install. iOS will ask to install the app; approve it.
- Open Settings > General > VPN & Device Management one more time, find the developer identity for the newly signed app, and tap Trust (on iOS 18 and iOS 26, Allow & Restart, then let the phone reboot).
Tap the new icon on your Home Screen and it should launch.

Import the IPA into Esign’s library, then sign and install it.
A reminder on the legal side: only sign and install apps you have the right to use, and get your IPA files from the developer or another legitimate source. On-device signing is genuinely useful for testing your own builds and running apps you’ve paid for, not for grabbing paid software for free.
Tips and troubleshooting
“Untrusted Developer” when you tap the app. You skipped the trust step. Go to Settings > General > VPN & Device Management, tap the developer profile for that app, and tap Trust (or Allow & Restart on iOS 18 and iOS 26).
Trust verification fails or hangs. Establishing trust contacts Apple’s servers, so the device needs an active internet connection at that moment, even though the rest of the flow is on-device. Get on Wi-Fi or cellular and try the trust step again.
The app stops opening after about 7 days. That’s the free-certificate lifespan. Re-sign the same IPA in Esign with a current certificate and reinstall. If this annoys you weekly, a paid or private certificate lasts far longer.
App crashes on launch or won’t install. Usually a certificate that’s already been revoked, or an IPA that doesn’t match your iOS version. Try a fresh certificate first, then a different build of the IPA.
Signing fails or hits the app limit. Free Apple IDs allow only 3 signed apps. Delete one you don’t need, or move to a paid certificate to lift the cap.
Everything broke at once. When a shared certificate is revoked, every app signed with it dies together. A private certificate avoids that shared-fate problem.
Uninstalling and cleaning up
Getting rid of a sideloaded app takes one extra step beyond a normal delete.
- Press and hold the app icon on the Home Screen, tap Remove App, then Delete App. That clears the app and its data.
- Open Settings > General > VPN & Device Management and find the certificate or developer profile that signed it. Tap it, then Remove Profile. The app won’t run again once its profile is gone, and you free up a slot under the 3-app free limit.
One thing to keep in mind: if a shared certificate gets revoked, every app you signed with it stops opening at once, not only the one you wanted gone. So you don’t always have to remove a profile by hand. Sometimes Apple does it for you, and takes the rest of the apps with it.
FAQ
Do I really not need a computer for any of this?
Right, the entire flow runs on the iPhone. The catch is the manual re-signing and the certificate fragility, plus you’ll need an internet connection for the trust step, which a desktop tool handles differently.
Why does my app stop working after a week?
A free certificate signs apps for only 7 days, so iOS refuses to launch them once that window closes. Re-sign in Esign, or switch to a longer-lived paid certificate to skip the routine.
Is Esign safe to download?
The tool itself is fine, but because so many rebuilt copies exist after the 2025 disruption, fakes carrying malware do circulate. Stick to the project’s GitHub or a well-known community source, and be wary of random “official” sites.
If Esign’s certificate situation gets too unstable for your taste, an enterprise-certificate alternative like Scarlet runs on-device the same way, while a desktop tool trades the need for a nearby computer for steadier signing.