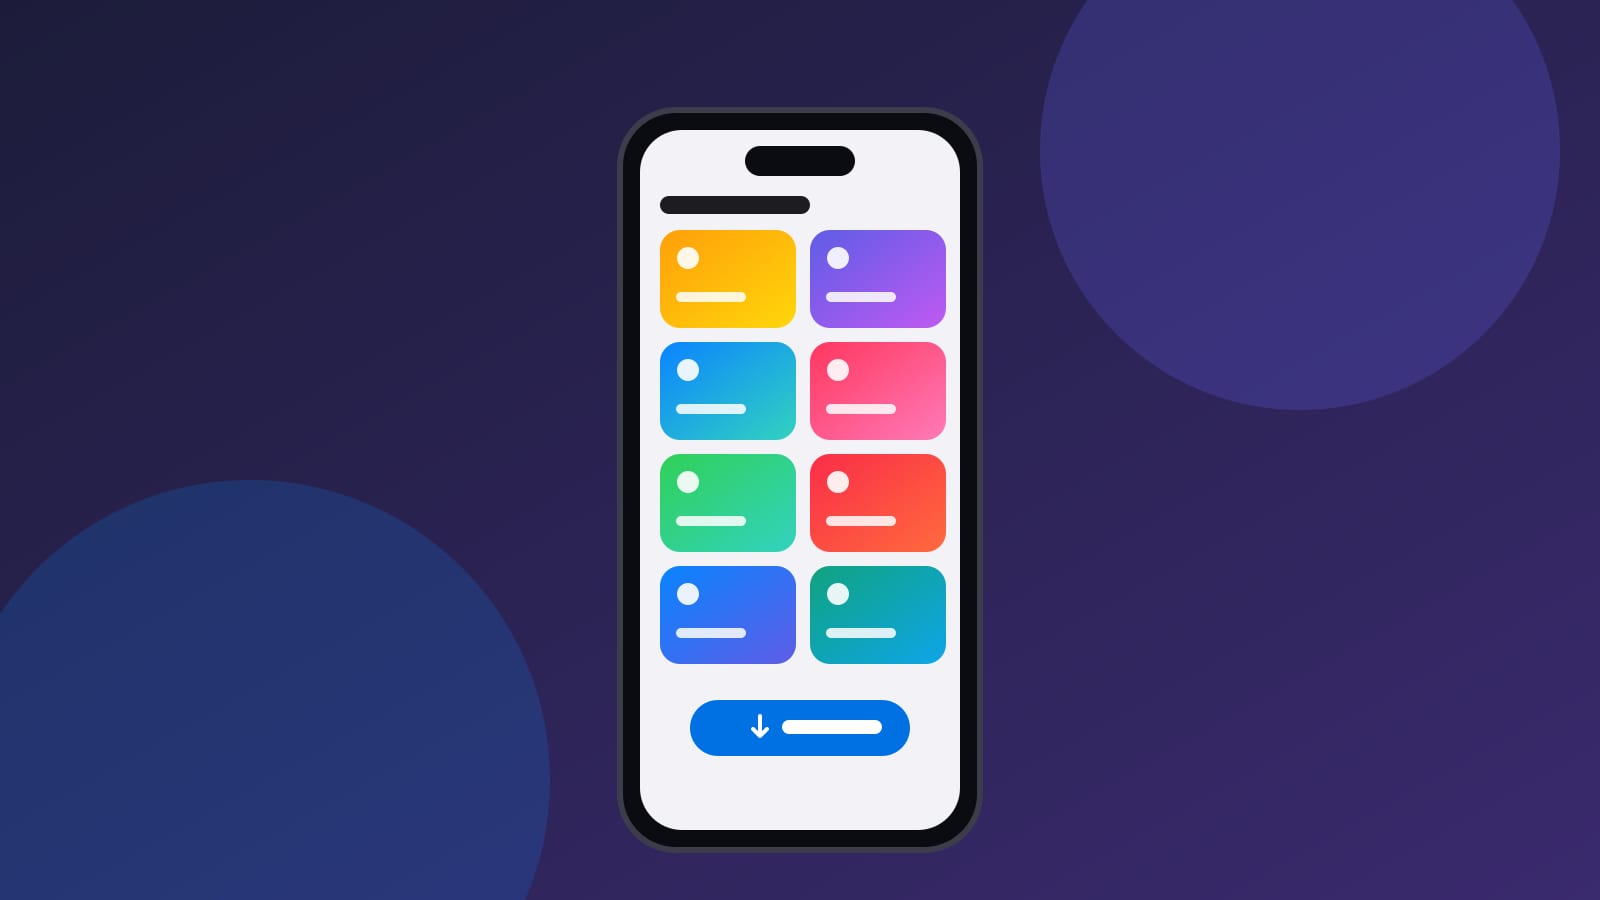
The first time you add a shortcut from a website, iOS throws a small pile of screens at you. There’s a preview full of actions you didn’t write, maybe a form asking for an API key, and then a pop-up asking whether some shortcut can talk to a server you’ve never heard of. None of it is hard. It just isn’t explained anywhere, so people either tap “Allow” on everything or give up halfway.
This guide walks through each of those screens in the order you’ll see them. Once you’ve done it twice, the whole thing takes about thirty seconds.
All you need is the Shortcuts app. It ships with every iPhone on iOS 13 or later, so unless you deleted it at some point, it’s already there. If you did, grab it again from the App Store.
1. Open the shortcut on your phone
Every shortcut page on LibShortcut has an Add Shortcut button below the article. Tap it, wait for the short countdown, and you’ll get a QR code and a View button.
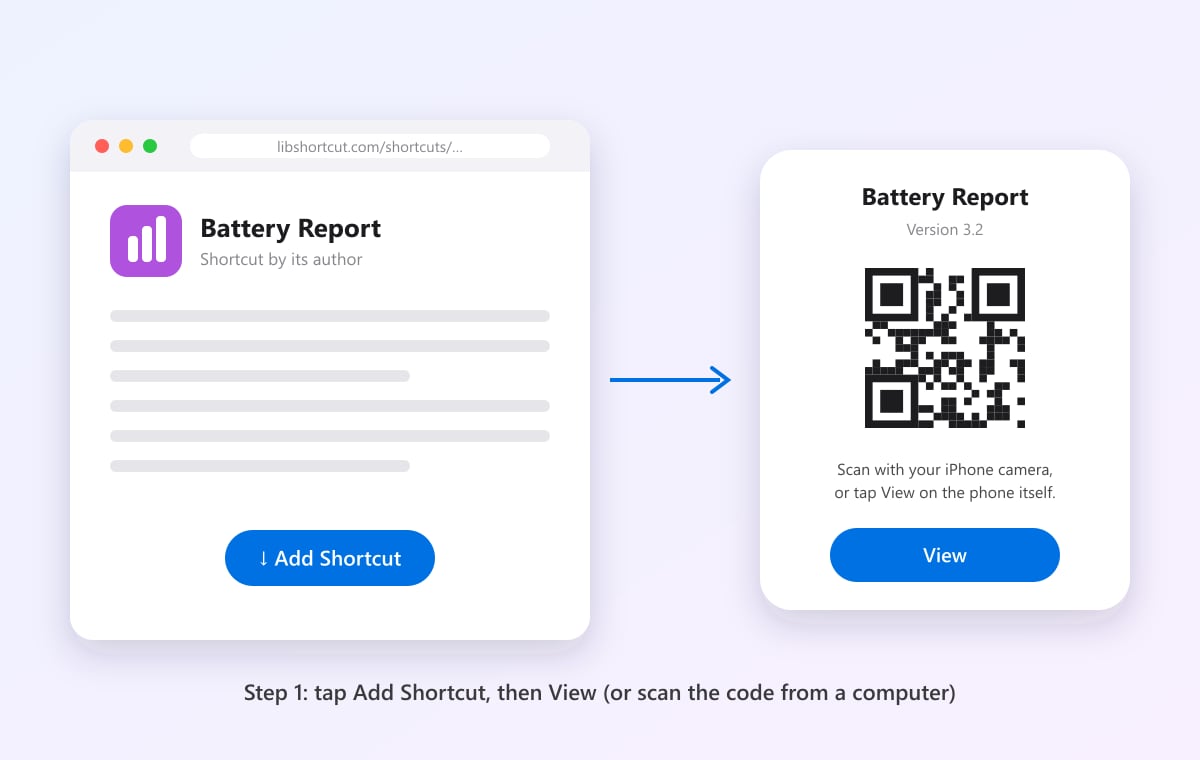
Tap Add Shortcut, then View. On a computer, scan the code with your iPhone instead.
If you’re already on your iPhone, tap View and Safari hands you over to the Shortcuts app. Browsing on a laptop? Point your iPhone’s camera at the QR code and tap the banner that pops up. Same result, no emailing links to yourself.
In case you’re wondering where the file actually comes from: shortcuts are shared through iCloud, Apple’s own system. The shortcut lives on Apple’s servers, not on ours.
2. Look at the preview before you add it
This is the screen most people skip, and it’s the one worth ten seconds of your attention. The preview shows the shortcut’s name, its icon and, further down, every action inside it.
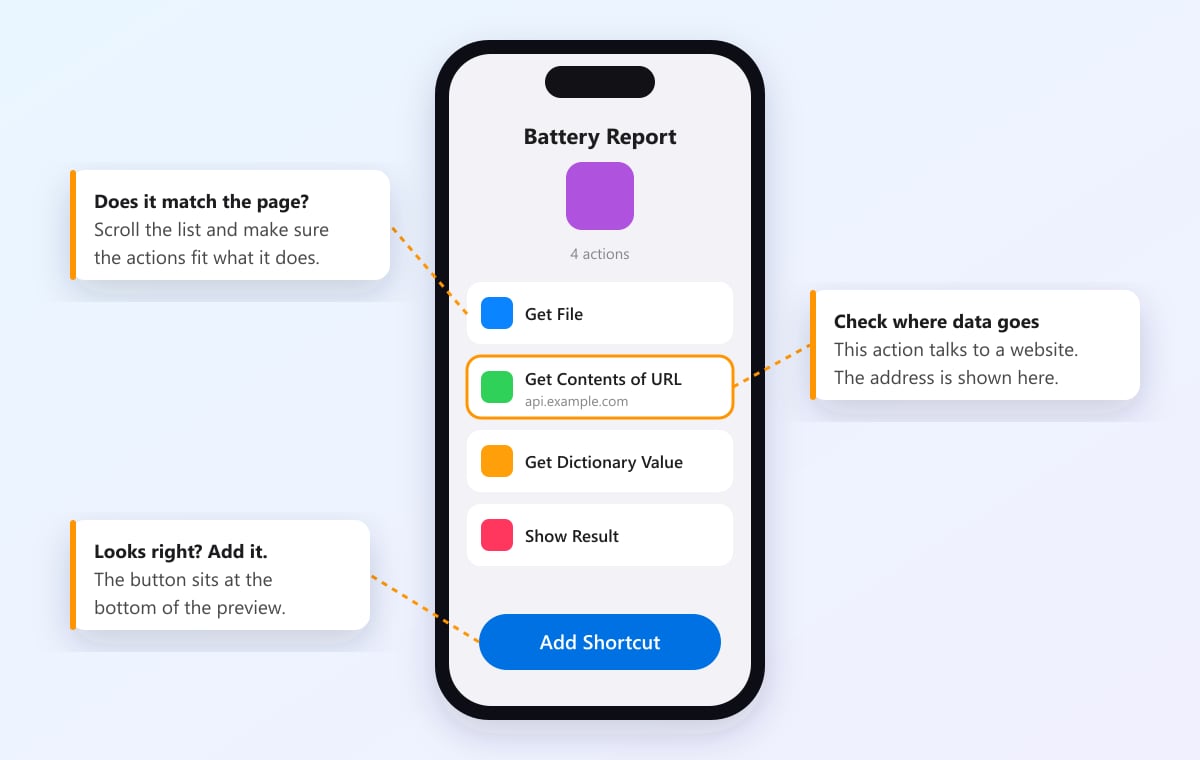
Skim the actions, check any web address, then tap Add Shortcut at the bottom.
You’re not auditing code here. You’re checking two things:
- Does it match what the page told you? A battery report that somehow includes a “Send Message” action deserves a second look.
- Where does your data go? Find any Get Contents of URL action. That’s the step that talks to a website, and the address sits right under it. An AI tool or a downloader needs a web request, that’s the whole point. Something that claims to work offline shouldn’t have one.
Happy with it? Scroll to the bottom and tap Add Shortcut.
You might remember older tutorials telling you to turn on Allow Untrusted Shortcuts first. That switch was only around on iOS 13 and 14. On anything newer, shortcuts from a link install without it, which is why you can’t find it in Settings.
3. Fill in the setup questions, if you get any
Some shortcuts open a Set Up Shortcut screen instead of adding straight away. The author left a few blanks for you to fill in, because only you know the answer.
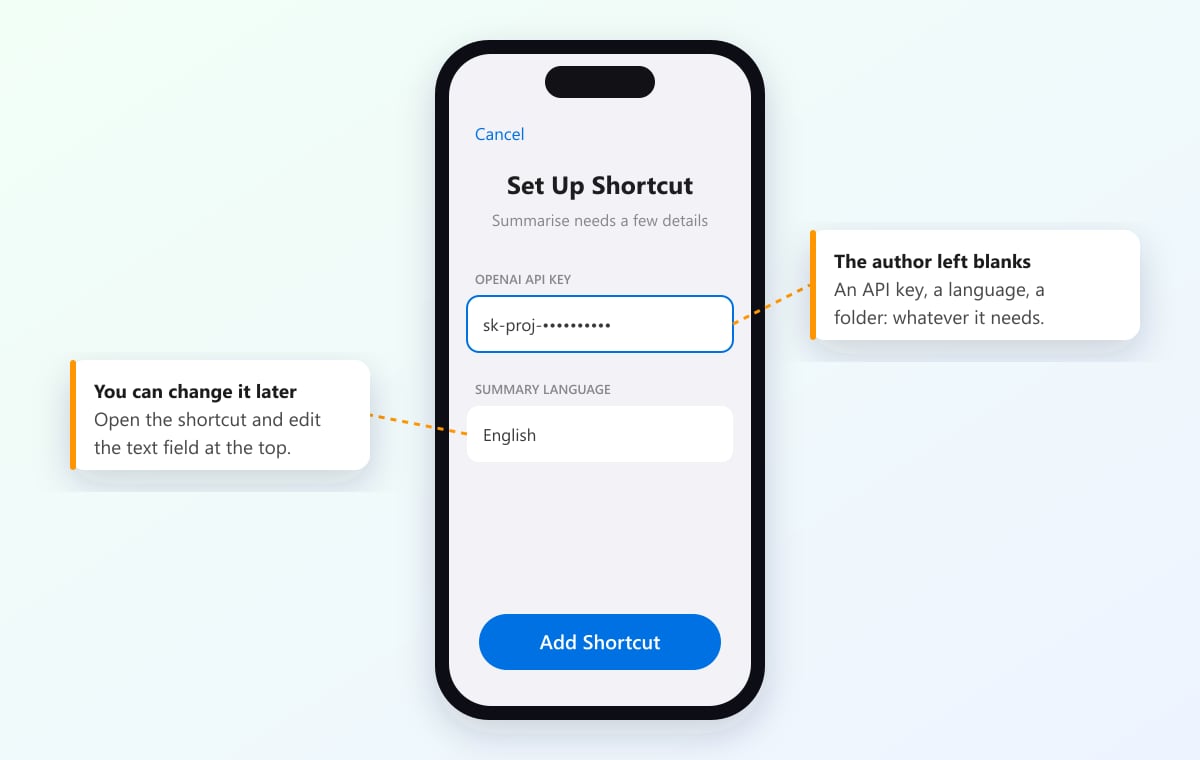
Setup questions are just blanks the author couldn’t fill in for you.
Typical examples are an API key for an AI service, the language you want answers in, or a default folder or playlist. Each shortcut page here tells you what it’s going to ask for, and where to get it if it’s something like a key.
Typed something wrong? No need to reinstall. Open the shortcut in the editor and you’ll usually find your answer in a text field near the top, ready to change.
4. Run it once and answer the permission prompts
Now run the shortcut from the Shortcuts tab. The first time it touches anything private, like your photos, your location or a website, iOS pauses and asks you first.
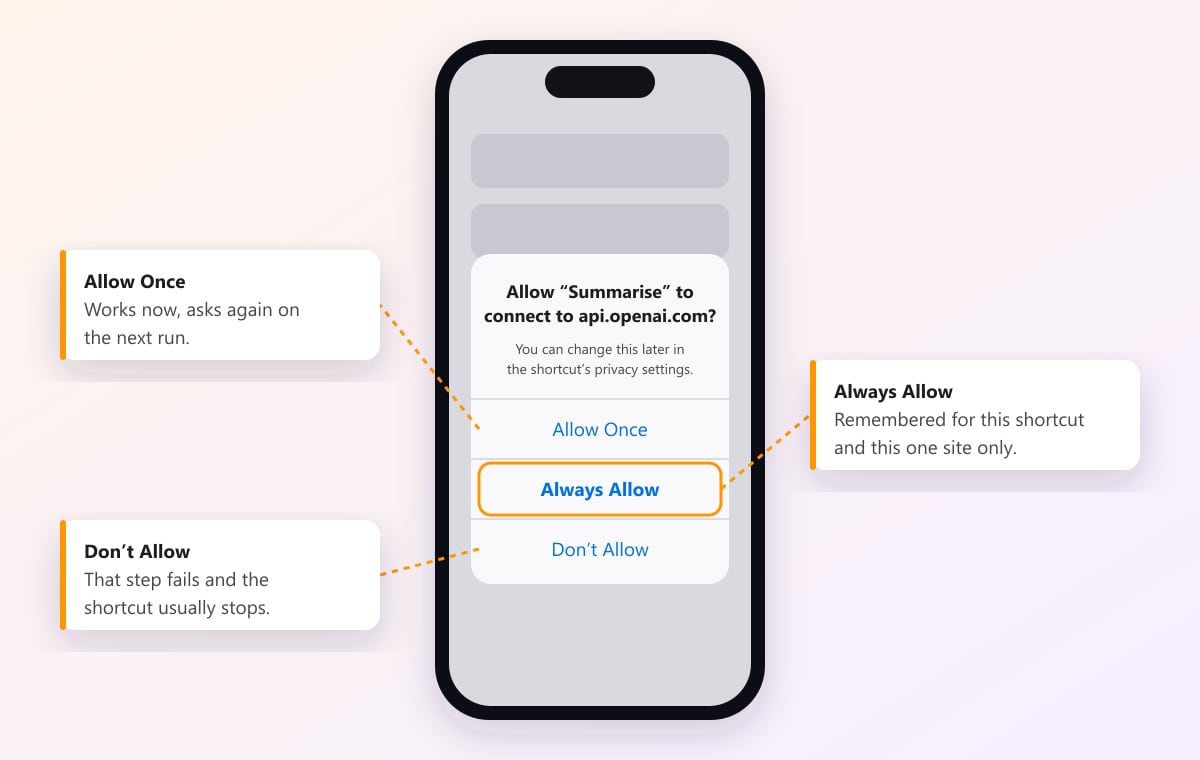
Always Allow only covers this shortcut and this one resource.
You’ll see three buttons:
- Allow Once lets it through this time and asks again on the next run.
- Always Allow remembers your answer for this shortcut and this resource.
- Don’t Allow blocks that step, and the shortcut usually stops there.
For a shortcut you trust, Always Allow is what turns it from a string of pop-ups into something you’ll actually use. It’s also narrower than it sounds. Letting a downloader reach one website doesn’t hand it your contacts or your photos.
If you change your mind later, open the shortcut, tap the ⓘ details button and go to Privacy. Every permission it has is listed there, and you can reset any of them.
A few shortcuts need a switch in Settings
Now and then a shortcut page will ask you to turn something on under Settings > Apps > Shortcuts > Advanced. On iOS 17 and earlier it’s Settings > Shortcuts > Advanced.
- Allow Sharing Large Amounts of Data is for shortcuts that pass a lot of data between apps, like alarm managers or anything working with big files.
- Allow Running Scripts is needed by shortcuts that run JavaScript on a web page or connect over SSH.
- Allow Deleting Without Confirmation lets a shortcut delete files or photos without asking each time. Only switch this one on if a shortcut you trust really needs it.
If the shortcut’s page doesn’t mention any of these, leave them alone.
5. Put it somewhere you’ll actually use it
Here’s the part people forget. A shortcut sitting in the Shortcuts app gets used for a week and then forgotten. Give it a home that fits how you’ll use it.
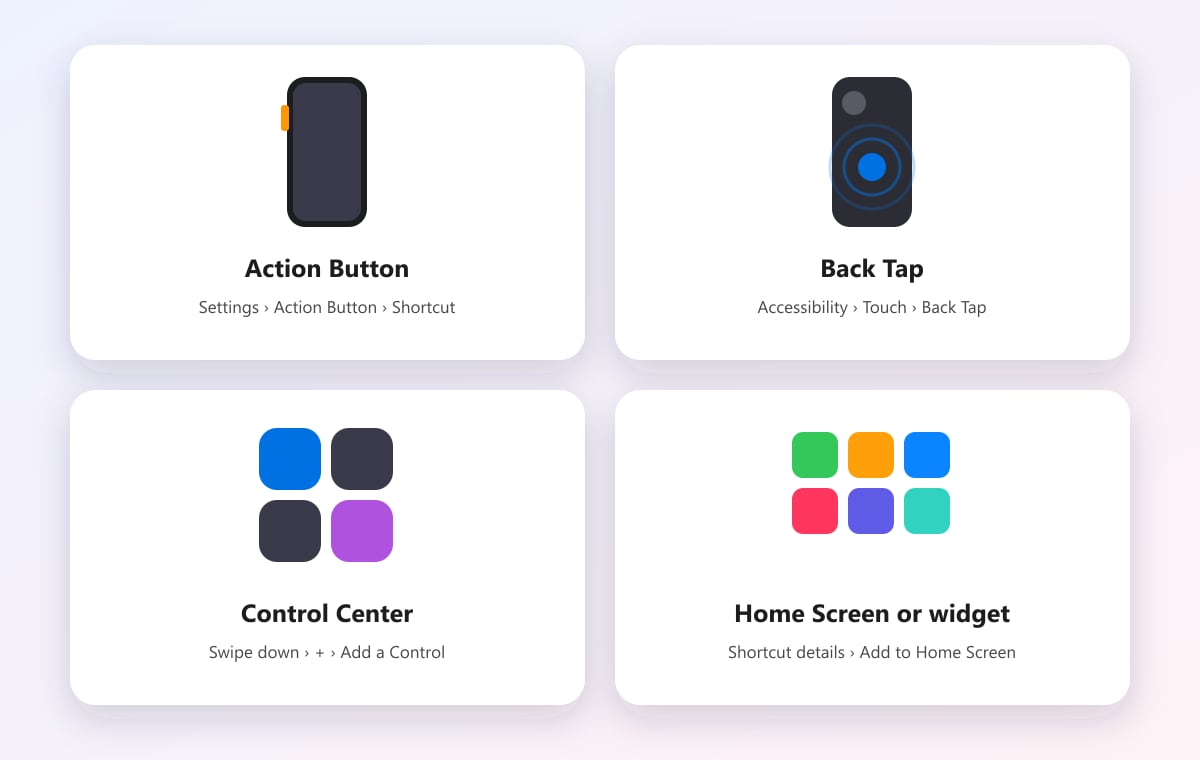
Pick whichever trigger is closest to where you’ll need it.
- Action Button (iPhone 15 Pro and newer): go to Settings > Action Button, swipe to Shortcut and choose it. Great for the one shortcut you use every day.
- Back Tap: Settings > Accessibility > Touch > Back Tap, pick double or triple tap, then scroll down to your shortcut. It works on any iPhone from the 8 onward.
- Control Center (iOS 18 and later): open Control Center, tap +, then Add a Control > Shortcuts.
- Home Screen or widget: in the shortcut’s details, tap Add to Home Screen and give it a proper icon, or add the Shortcuts widget and choose which ones it shows.
- Siri: just say the shortcut’s name. A short, easy-to-say name helps more than you’d think.
- Share Sheet: for shortcuts that work on a link, photo or file, turn on Show in Share Sheet in the details screen so it shows up when you tap Share in other apps.
When you’re ready for more, look at the Automation tab. You can run a shortcut at a set time, when you get home, when you connect to CarPlay or when your battery drops below a certain level, without touching your phone at all.
Keeping it up to date
Shortcuts don’t update themselves like apps do. When an author ships a fix, you add the new version and iOS asks whether to Replace your copy or Keep Both. Replace is usually the right call, though you may have to answer the setup questions again.
Every shortcut page here shows the latest version and the date its author released it. Some shortcuts also check for updates themselves and tell you when a new one is out.
When something goes wrong
The preview never opens. Make sure Shortcuts is installed and you’re opening the link in Safari on the iPhone itself. In-app browsers, like the ones inside Instagram or Facebook, often don’t pass the link along. Copy it into Safari and try again.
“This shortcut can’t be opened because your security settings don’t allow untrusted shortcuts.” You’re on iOS 14 or earlier. Run any shortcut from the Gallery tab once, then go to Settings > Shortcuts and turn on Allow Untrusted Shortcuts.
It worked yesterday and fails today. Shortcuts that rely on a website or API break when that service changes something. Check the shortcut’s page for a newer version and look at the “Updated” date. If the author hasn’t touched it in a long time, another shortcut in the same category is probably the better bet.
It keeps asking for permission. You probably picked Allow Once at some point. Reset the permission from the shortcut’s Privacy tab and choose Always Allow next time.
An error mentions a missing app. Some shortcuts drive third-party apps like Spotify, Notion or Toolbox Pro behind the scenes. The “Apps it needs” section on each shortcut page lists them, with App Store links.
That’s really all there is to it: open, glance at the actions, add, allow, and park it on a button you’ll actually press. When you’re ready to find the next one, the shortcut library is sorted by category.